
On Building A Stick
A Greenland Paddle Appreciation Post
I finally finished making my primary paddle for the trip, and with only one week to go, it’s not a moment too soon.


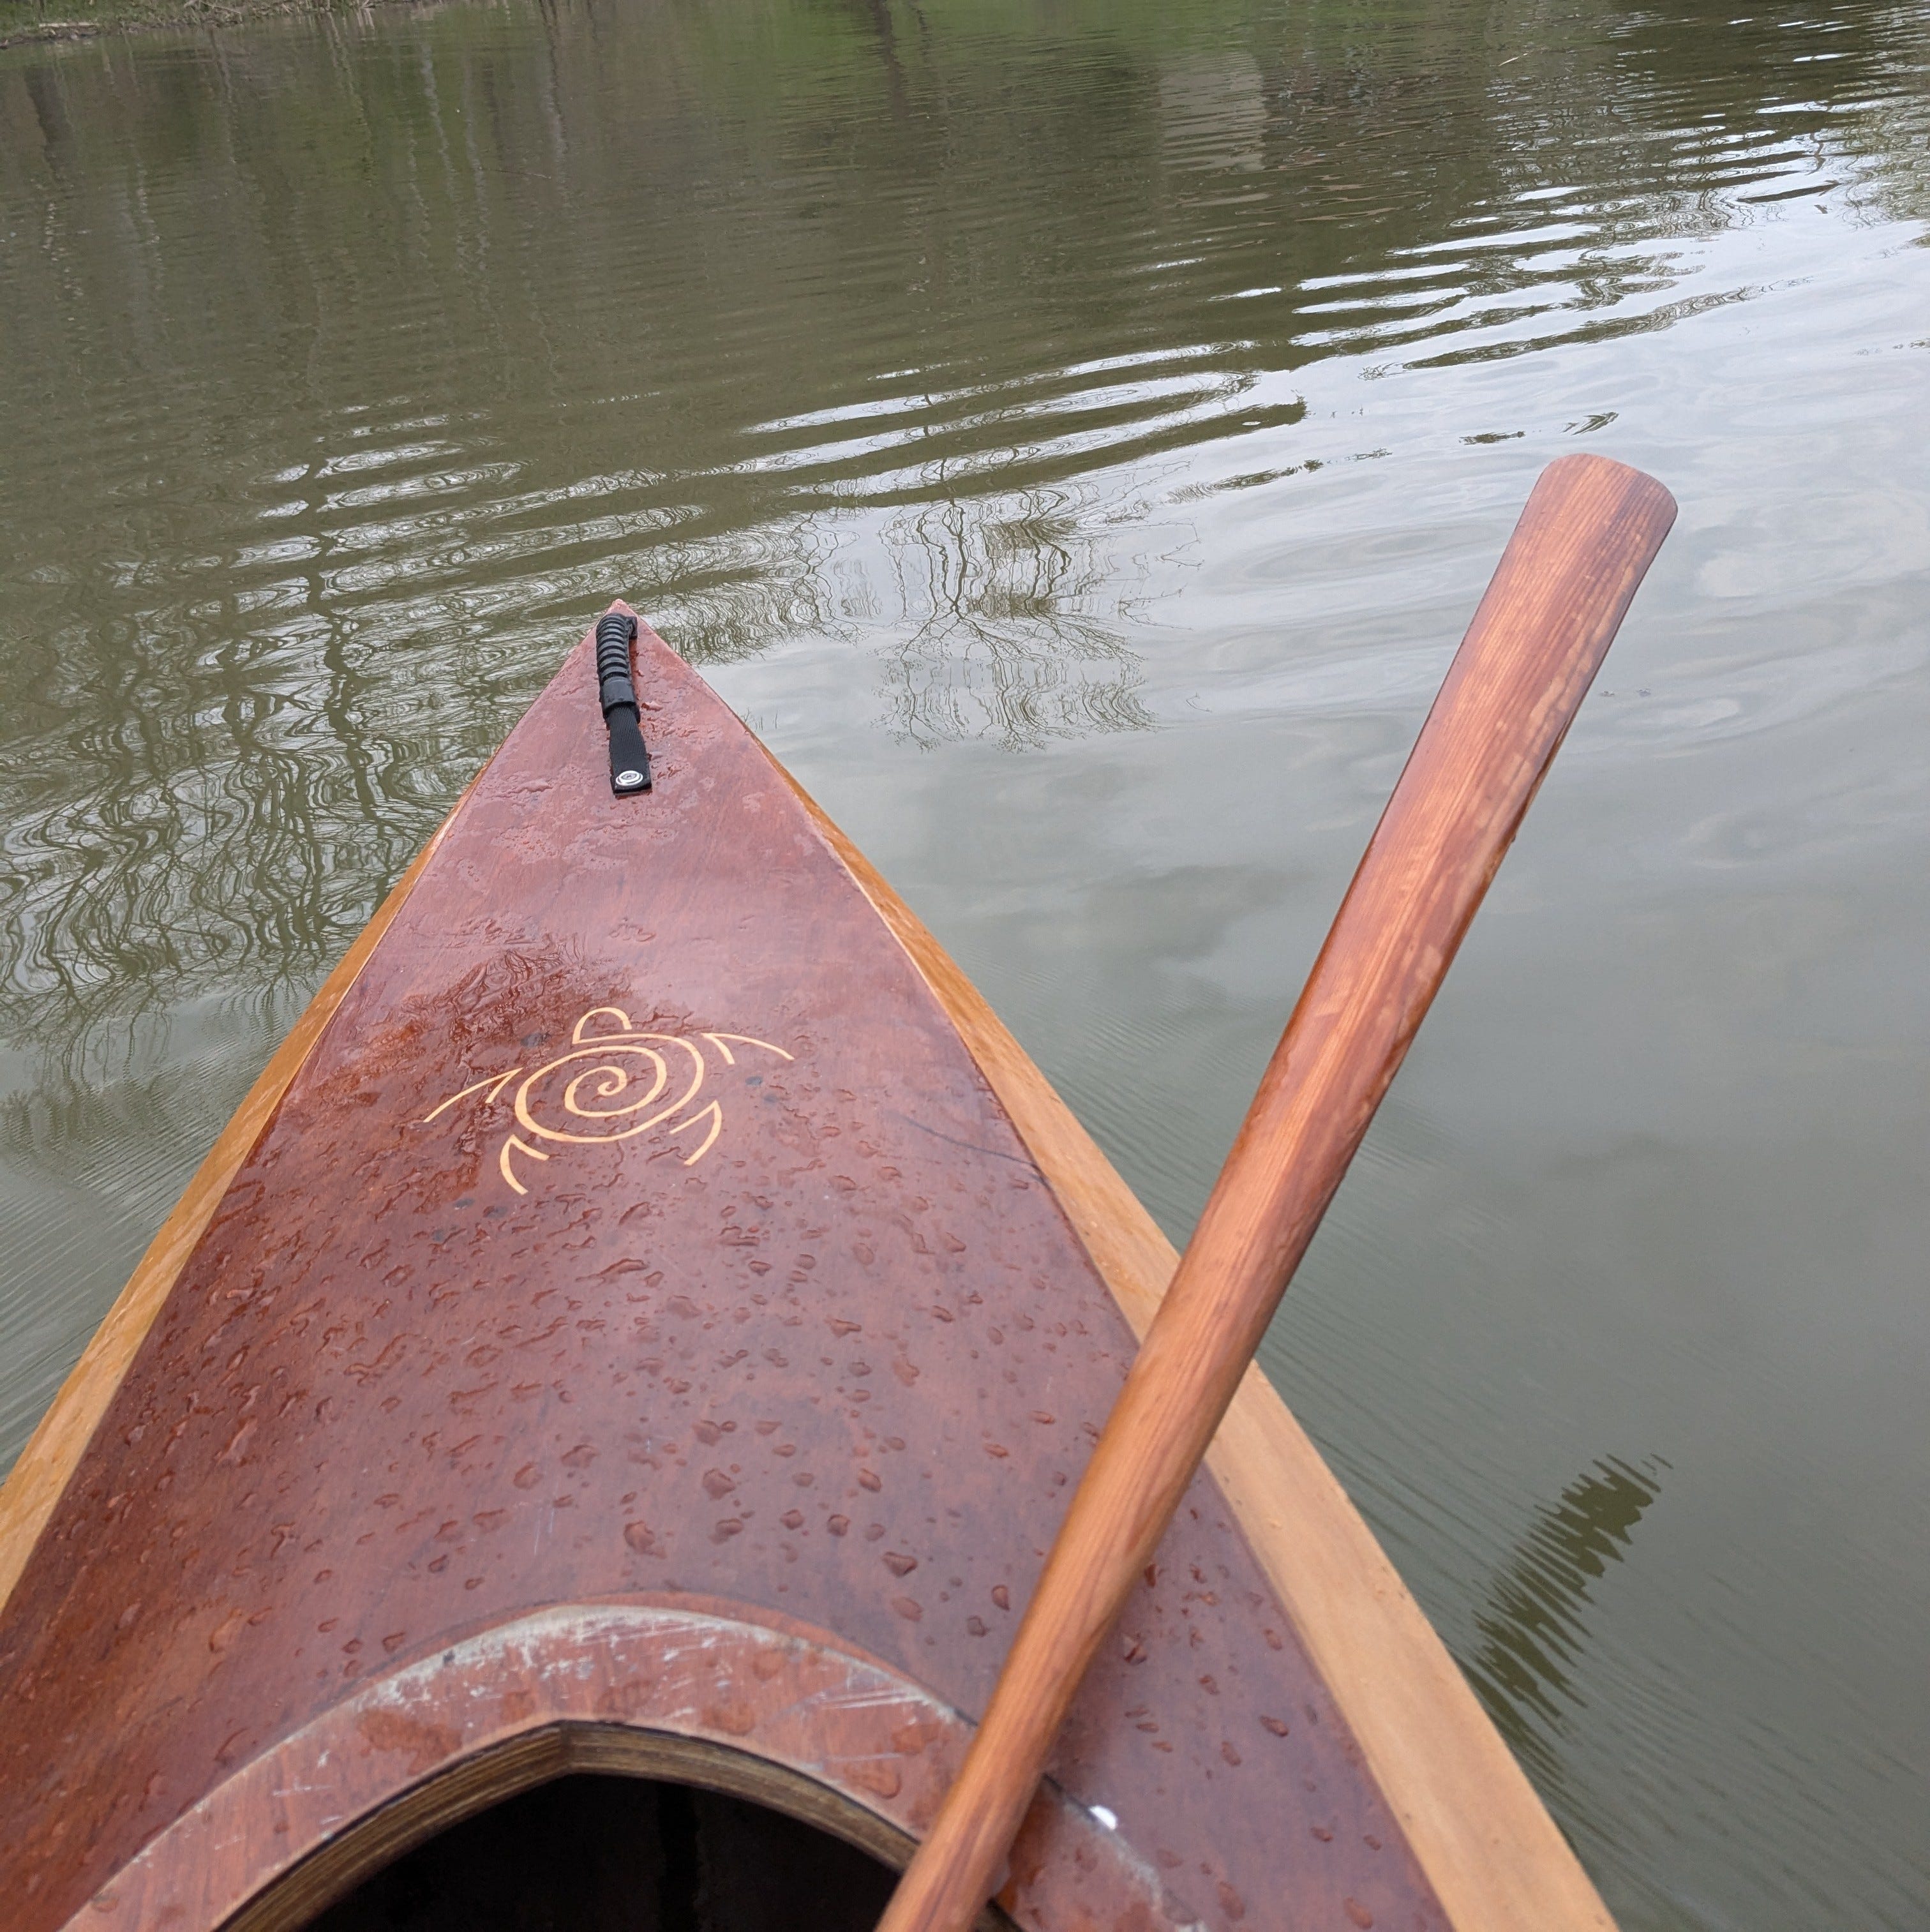
I’ve been using a Greenland Paddle (GP) for so many years at this points that I sometimes forget that it’s not what people think of when they think “kayak paddle”. And when they see it, they often give me a skeptical look. It doesn’t help that its other name is a “stick”, and really that’s what it looks like — especially this one, since it’s shoulderless, which means the blades (what goes in the water) taper all the way to the loom (what you hold).
I started making this paddle in March:
You start with a cedar 2x4 (or other lightweight, rot resistant, straight-grained softwood) and then cut it down from there.
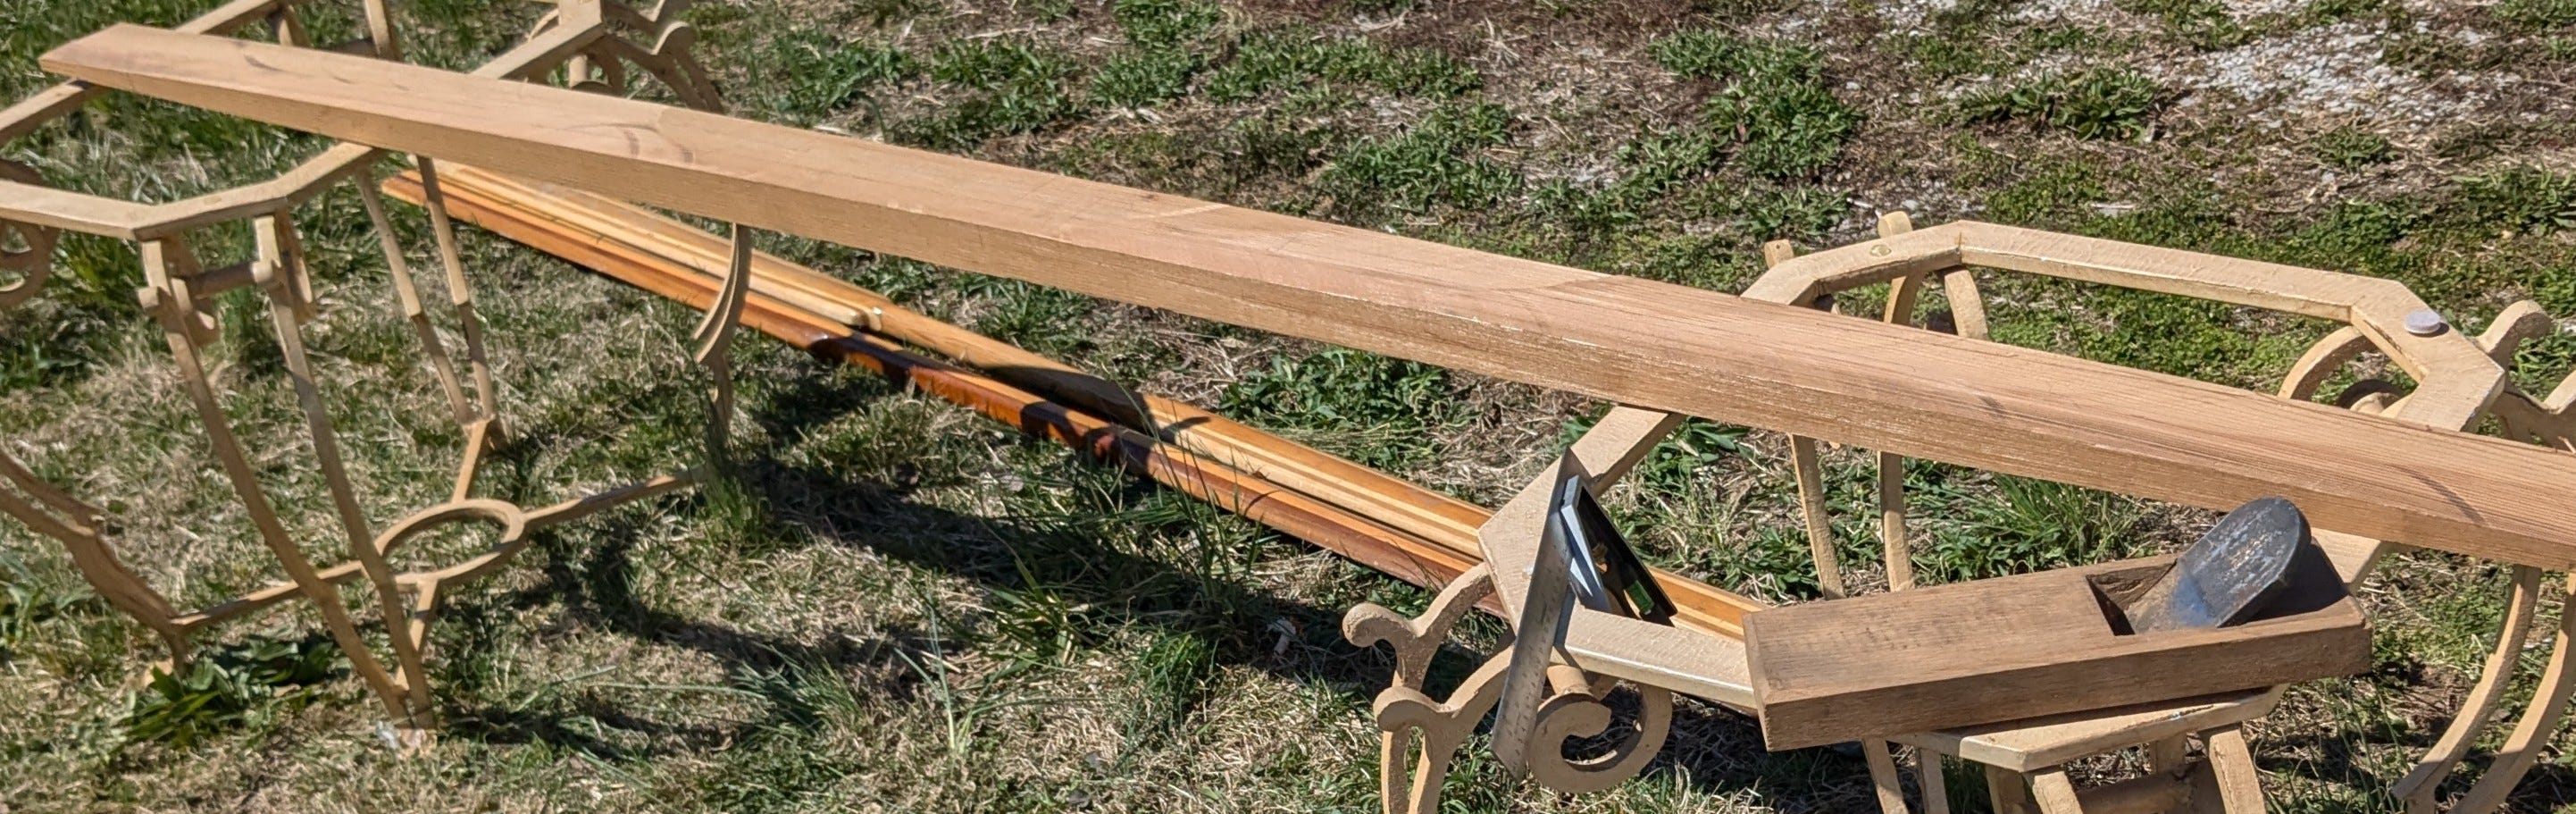


It really doesn’t take much in terms of materials, tools, or time to make a decent Greenland Paddle. After 2 dedicated days of shaping and a week of finishing, I took it out for my first test paddle around Lake Linville, near my house:
A stick is so much quieter than a European paddle! It makes kayaking much more peaceful, plus the longer blades make it easier to adjust course without changing the force or cadence of your stroke. You simply change how much of the blade goes into the water.
I really don’t understand why more people don’t love them.
Since the blades go all the way to the loom, vegetation doesn’t catch on the the back of the paddle when you’re paddling through tall grasses or lillipads, something I will be very grateful for in the early part of this trip.
But still: the whole widest point is only about 3 1/4 inches wide, and the paddle is about the same length as a Euro paddle, so how can it possibly keep up?
I’ll admit, I don’t really know. Some people swear that with the right technique, you can paddle as fast with a GP paddle as one with Euro blades, while others just accept that the decrease in speed is worth the other benefits of GP.
GP paddles are better on your joints because you ease in and out of the stroke, rather than all of the force hitting at once when the blade first goes into the water, which makes paddling for 8-10 hours a day much more pleasant. There are also a few different types of strokes you can use with a stick, which helps keep any one set of muscles or joints from being overworked on long trips like this. I’ve convinced Sydney to take a stick as her backup paddle. We’ll see if I can convert her completely by the end of the trip!
But wait, didn’t I say I did that I first tested this paddle back in March? What happened between then and now so that I’m only just now calling it done at the end of July?
3 Reasons Why My Paddle Wasn’t Finished in March:
Tung Oil Finish: The finish I chose to use to protect and waterproof this paddle is tung oil because I like the feel, but it takes FOR-EV-ER. The general rule of thumb is to apply a new coat
once a day for 4 days, then
once a week for 4 week, then
once a month for 4 months, then
once a year for the rest of its life
Practice: I was paddling with it. It was going to be my primary paddle - I needed to make sure I liked it and spend some time getting used to it. This was my first time using a shoulderless paddle, and it was also a slightly more traditional shape than the paddle I had been using, with a more rounded tip and more pronounced taper. It was also the first one I had made. But constant use meant constant wear, and one section split badly enough I needed to fill it with epoxy and sawdust. Yeah, yeah, I know I was messing with my already tight finishing timeline, but it was worth it to know it was the right paddle to bring on the trip.
Replacement Tips: Even before my first test paddle, I knew I needed to replace the ends of the paddle with something more durable so they can withstand being jabbed into rocks or against the shore at takeouts. A traditional Greenland paddle would use whale bone. I chose hard maple. This part took another few days of dedicated work (longer than shaping the paddle in the first place!), plus it started the finishing process all over for the area at the end of the blade that was reshaped to meet the tips.
Between those things, I just got around to putting the logo on a few weeks ago, applying a few more coats of finish, (kayaking a few more times), and I’m finally ready to call it done… for now.
Thanks for reading River Runs Full! Subscribe for free to receive new posts and support our journey.